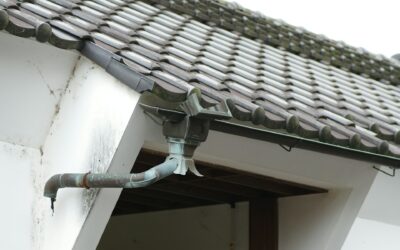
Roof leaks are a common headache for many homeowners, especially in areas like Bendigo where unpredictable weather can test the limits of your roof. One of the best ways to prevent these pesky leaks is by ensuring you have proper flashing installations. Flashing acts as a barrier, guiding water away from key areas like chimneys, vents, and intersections where different parts of the roof meet. Without it, water can sneak into your home, leading to water damage, mold, and other issues you’d rather avoid.
In Bendigo, where seasonal rains are not uncommon, having secure and effective flashing is crucial to maintaining your roof’s health. By installing flashing correctly, you can protect your home from leaks and extend your roof’s lifespan. Understanding how flashing works and its importance can save you both time and money down the line.
Understanding Roof Flashing
Roof flashing might sound like jargon, but it’s a straightforward concept that plays a key role in keeping your home dry and safe. Essentially, flashing is a flat, thin piece of material – often made from metal like aluminium or galvanized steel – that’s placed around critical areas of your roof. These spots include chimneys, skylights, and places where the roof meets vertical structures. Flashing helps direct water away from these areas to prevent it from seeping into your home.
Different types of flashing materials are available, each with its benefits. Here are a few common types:
– Aluminium Flashing: It’s lightweight and easy to work with, making it a popular choice for homeowners and professionals.
– Copper Flashing: Known for its durability and aesthetic appeal, it can add a touch of elegance to your roof.
– Galvanized Steel Flashing: Offers excellent corrosion resistance and is often used in areas prone to harsh weather conditions.
– Lead Flashing: Though heavier and less commonly used today, lead flashing is extremely durable and often found in older homes.
Each type has its specific uses, advantages, and suitability depending on your roof’s design and local climate. Choosing the right material is crucial, as it ensures that your roof can withstand the elements and keep your home protected from moisture.
Common Issues with Flashing Installations
Even if your flashing looks shiny and new, poor installation can lead to significant problems over time. Improperly installed flashing is a frequent culprit of roof leaks since it fails to guide water away effectively. These issues can arise for various reasons. Sometimes, flashing is not sealed properly, causing gaps where water can sneak through. In other cases, the wrong type of material might be used, leading to premature wear and tear.
Other common problems include:
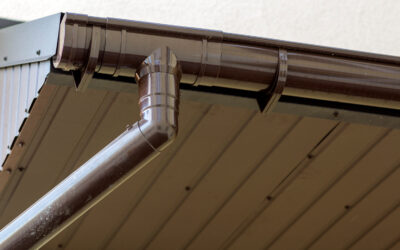
– Gaps and Overlaps: Flashing should overlap properly to prevent water from slipping through the cracks. If not, moisture can find its way in.
– Nail Holes in Unsealed Areas: Fasteners should be secure but also sealed properly to avoid water penetration.
– Loose Flashing: Over time, weather conditions or poor installation can cause flashing to become loose, defeating its purpose.
– Material Corrosion: If inappropriate materials are used, corrosion can set in quickly, compromising the integrity of the flashing.
For example, a homeowner might have their roof leak after a storm. Upon inspection, they may discover that the flashing around the chimney was not properly sealed, allowing wind-driven rain to enter through the gaps. This situation underscores the importance of correct flashing installation and regular maintenance. When flashing is installed correctly, it can offer solid protection and peace of mind no matter how unpredictable the weather gets.
Steps to Ensure Effective Flashing Installation
A solid flashing installation begins with understanding the steps involved. Here’s a straightforward guide to help make sure your flashing does its job right:
1. Select the Right Material
Choose the appropriate flashing type for each part of your roof. For instance, if you have a chimney, copper might be a great choice due to its durability and aesthetic appeal.
2. Preparation
Clean the area where the flashing will be installed. Remove debris, old flashing, and any materials that might prevent a tight seal.
3. Positioning
Correct placement is key. Make sure the flashing is placed under the roof shingles and wraps around the surface snugly, especially in corners or where different roofing sections meet.
4. Sealing
Use high-quality roof sealant to seal the edges. This stops water from sneaking underneath and causing damage.
5. Fastening
Secure the flashing with the appropriate nails or screws, making sure they’re sealed properly to avoid water entry through the nail or screw holes.
Consider these steps vital — just like the layers of a birthday cake, each one serves a purpose and brings the whole system together. By following these guidelines, you can help ensure that moisture stays on the outside, where it belongs.
Benefits of Professional Flashing Installation
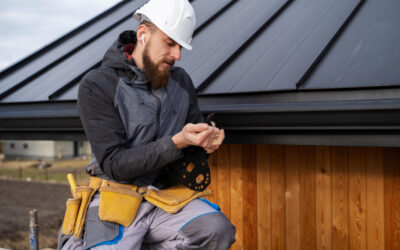
While you might be tempted to tackle flashing installation yourself, there are significant perks to letting experienced professionals handle it. First, pros possess the expertise honed from countless jobs, which means they can tackle any unexpected issues that arise.
Advantages of hiring a professional include:
– Proper Evaluation: They can assess and identify areas of concern that might not be obvious to the untrained eye.
– Correct Installation: With expert knowledge, they ensure each piece is precisely installed, reducing the chance of leaks.
– Time and Stress Saving: Professional services complete the job efficiently, freeing you from the hassle and possible mistakes of DIY work.
Also, pros have the right tools and materials on hand, so you won’t have to invest in equipment you might never use again. When you consider the peace of mind that comes from knowing the job is done correctly, it’s a sensible choice to rely on seasoned professionals.
Keeping Your Roof Leak-Free in Bendigo
To wrap things up, it’s clear that proper flashing installation plays a key role in maintaining a dry, sturdy home, especially in tricky climates. By understanding flashing materials, common issues, and the steps needed for effective installation, you ensure your roof stands up to Bendigo’s unpredictable weather. Regular inspections and maintenance are vital — these proactive steps can catch small issues before they turn into costly repairs.
Simply put, paying attention to your roof’s flashing can save you a lot of hassle. It’s about creating a protective shield that directs nature’s forces away from your home’s structure. When you prioritise correct installation and regular checks, you’re setting your home up for long-lasting protection.
For those looking to safeguard their homes from unwanted leaks, investing in expert flashing installation is a wise move. Roof Restoration Bendigo ensures that all installations are handled with precision and care, setting your home up for long-lasting weather protection. Reach out to us for assistance and keep your roof in peak condition.